


Last Updated: October 29, 2026
Quick Summary
Clean candle soot from walls by dry-cleaning loose particles first with a vacuum brush, dry sponge, or pencil eraser, then wet-clean what remains with a weak mild dish soap and warm water solution. Work bottom to top, keep the cloth barely damp, and dry the wall as you go.
- Wetting loose soot first turns powder into a smear that pushes deeper into paint.
- Mix only a few drops of mild dish soap into warm water and rinse the cloth often.
- Flat paint burnishes into shiny spots when rubbed hard, so skip the melamine sponge.
- Trim wicks to about a quarter inch before every burn to prevent soot.
- Call a professional if the stain will not lift after two gentle attempts.
Table of Contents
- Why Candle Soot Sticks to Walls (and Why It Matters)
- What You'll Need Before You Start Cleaning Soot
- Step 1: Dry-Clean Loose Soot First
- Step 2: How to Remove Soot from Painted Walls with Wet Cleaning
- Does Dish Soap Remove Soot from Walls?
- The Best Cleaner for Soot on Walls by Surface Type
- How to Prevent Candle Soot on Walls
- When to Stop Cleaning and Call a Professional
- Frequently Asked Questions
Why Candle Soot Sticks to Walls (and Why It Matters)
Candle soot is the fine black powder left behind when a candle burns inefficiently, and it settles on walls and ceilings faster than most people expect.
Why does it matter? Because soot is acidic and slightly oily. Left alone, it bonds with paint and becomes much harder to lift.
Here is the good news. Most candle soot on walls comes off with items you already own. The trick is the order you use them in.
Below, we walk through the full process, from dry removal to wet cleaning to prevention.
What You'll Need Before You Start Cleaning Soot
Gather your supplies first so you are not running to the kitchen mid-scrub. Most of these are already in your home.
- A vacuum with a brush attachment
- A dry sponge or soft microfiber cloth
- A clean pencil eraser
- Two slices of plain white bread
- Mild dish soap
- White vinegar
- Baking soda
- Warm water
- Two buckets or bowls
- A melamine sponge for tough spots
Total time: about 30 to 45 minutes for a typical wall section.
Before you touch the wall, test any wet method on an inconspicuous area. A closet corner or the wall behind a piece of furniture works well. This one step saves a lot of regret.
Step 1: Dry-Clean Loose Soot First
Dry cleaning comes before any water. This is the step most people skip, and it is the one that matters most. Wetting loose soot turns powder into a smear that pushes deeper into the paint.
Start with the gentlest tool and work up. Vacuum, then dry sponge, then eraser.
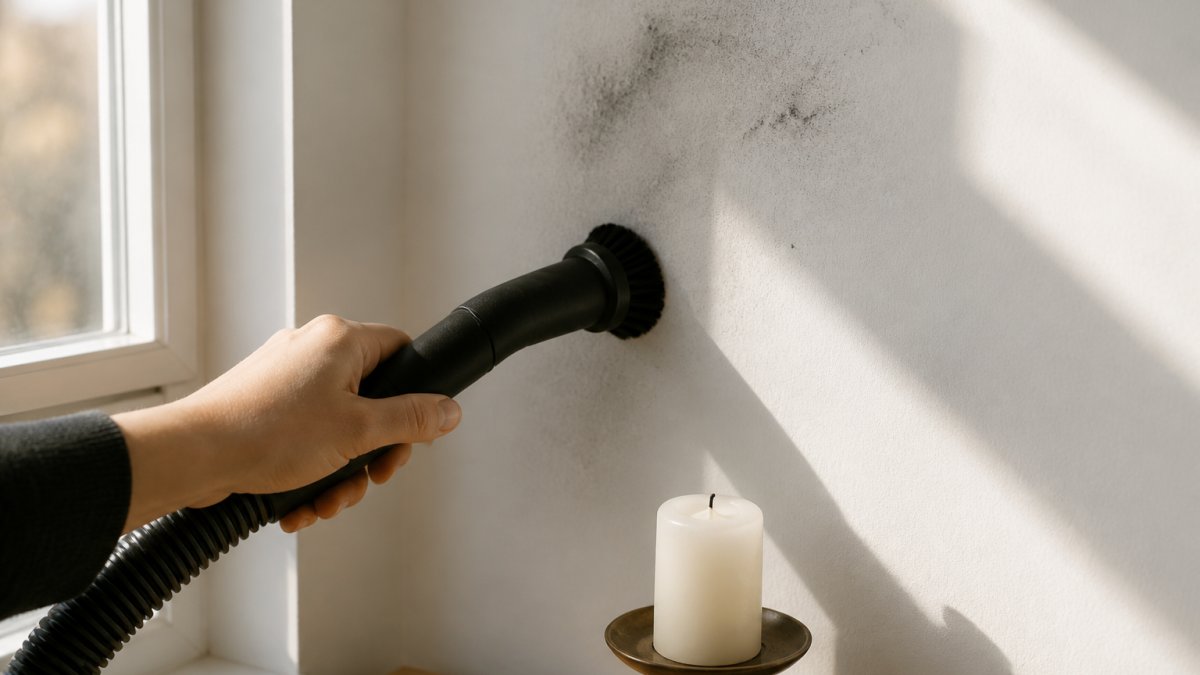
Vacuuming and Dry Sponging
Run the vacuum brush attachment lightly over the soot marks. Do not press hard. You want to lift loose particles, not grind them in.
Follow with a dry sponge or soft cloth. Wipe in one direction, top to bottom. Shake the sponge out outdoors as it loads up.
Pencil Eraser and White Bread Tricks
A clean pencil eraser works well on small soot marks, especially on painted walls. Rub gently with light pressure. Stop if the paint starts to dull.
The white bread trick sounds odd, but it works. Press a slice of plain white bread against a soot smudge and lift. The bread acts as a soft, fine abrasive that grabs particles without scratching the surface. Use fresh bread with no crust.
Step 2: How to Remove Soot from Painted Walls with Wet Cleaning
Once the loose soot is gone, wet cleaning handles what is left. This is where most people learn how to remove soot from painted walls without wrecking the finish. The key is a mild solution and a light touch.
Work from the bottom of the stain upward. This stops dirty water from running down over clean wall and leaving streaks.
Mild Soap and Warm Water
Mix a few drops of mild dish soap into a bowl of warm water. Dampen a soft cloth, wring it out well, and wipe gently. Rinse the cloth often.
Dry the wall with a clean towel as you go. Do not let water sit on the paint.
Vinegar and Baking Soda Paste
For stubborn stains, mix white vinegar and water in equal parts. Wipe the area with a cloth dampened in the solution.
For baked-on soot, make a baking soda paste with baking soda and a little water. Apply it to the stain, let it sit briefly, then wipe gently with a damp sponge. Rinse the area well afterward.
Watch out: never mix vinegar and baking soda in the same container and scrub with the fizzing mix. They cancel each other out. Use them one at a time.
Does Dish Soap Remove Soot from Walls?
Yes, mild dish soap removes most candle soot from walls when used correctly. A few drops in warm water lift the oily residue that plain water leaves behind. The catch is strength. Too much soap leaves a film that attracts new dust, so keep the mix weak and rinse well.
Here is a quick comparison of the main methods and what each one suits:
| Method | Best For | Risk Level | Notes |
|---|---|---|---|
| Vacuum and dry sponge | Fresh, loose soot | Low | Always do this first |
| Pencil eraser or white bread | Small marks on painted walls | Low | Light pressure only |
| Mild dish soap and water | General soot removal | Low | Keep the mix weak |
| Vinegar and water | Light residue | Medium | Test on an inconspicuous area |
| Baking soda paste | Stubborn stains | Medium | Rinse well afterward |
| Melamine sponge | Tough spots on durable finishes | High | Can dull paint if overused |
The Best Cleaner for Soot on Walls by Surface Type
The best cleaner for soot on walls depends on the finish, not the stain. Flat paint grabs soot and holds it, while semi-gloss lets it go with a light wipe. Match your method to the surface and you avoid most damage. The table below summarizes the safest approach for each common wall material, followed by the details that matter.
| Surface | First choice | Avoid | Damage risk |
|---|---|---|---|
| Flat paint | Vacuum, dry sponge, pencil eraser | Melamine sponge, heavy scrubbing | Burnishing (shiny spots), paint removal |
| Eggshell / satin | Damp cloth with mild dish soap | Excessive water, abrasive pads | Dulling the sheen |
| Semi-gloss / gloss | Damp sponge with mild soap or vinegar solution | Solvent cleaners, scrubbing pads | Scratches, haze |
| Wallpaper | Dry sponge, soft brush, bread | Any liquid, rubbing | Lifting seams, water stains, ink bleed |
| Brick / stone | Soft brush, mild soap solution | Acid cleaners, wire brushes | Etching, discoloration |
| Ceilings | Vacuum with extension wand, then damp cloth | Overhead soaking, unstable ladders | Streaks, joint damage |
Flat, Satin, and Semi-Gloss Paint
Flat paint is the hardest to clean. It has a porous, matte surface that traps soot and shows every scrub mark. Use dry methods first, then a barely damp cloth with mild soap. Skip the melamine sponge here. A common pattern is that flat paint burnishes, develops a shiny spot, when rubbed too hard, and that mark cannot be undone without repainting.
Satin and semi-gloss hold up better. You can use a damp sponge and a mild solution with more confidence. Still rub gently, and rinse the sponge often. Glossy finishes are the most forgiving but show scratches easily, so avoid abrasive pads and gritty cleaners.
Wallpaper, Brick, and Ceilings
Wallpaper is fragile. Use the dry methods only, vacuum brush, dry sponge, or a slice of plain white bread, and avoid soaking the paper. Water can lift seams, cause ink to bleed, and leave permanent stains.
For brick, a soft brush and a mild soap solution work well because the texture hides small marks. Avoid acid-based cleaners and wire brushes, which can etch or discolor the surface.
Ceilings collect soot directly above candles. Use a vacuum with an extension wand first, then a damp cloth on a stable step stool. Work in small sections and keep the cloth barely damp, overhead soaking can drip and streak.
Unpainted and Specialty Surfaces
Unpainted wood should be treated like flat paint: dry methods first, then a barely damp cloth with mild soap. Avoid soaking the wood, which can raise the grain. For stone or concrete, a soft brush and mild detergent are usually safe, but test first because some stone is porous and stains easily. When in doubt, choose the gentlest method and increase only if needed.
How to Prevent Candle Soot on Walls
Prevention beats cleaning every time. A few small habits keep soot off your walls and help your candles burn cleaner and last longer. The key is understanding why soot forms: incomplete combustion releases carbon particles, and anything that disturbs the flame or starves it of oxygen increases that release.
- Trim the wick to about a quarter inch before every burn. A long wick creates a large, smoky flame that throws off carbon. Use a wick trimmer or sharp scissors, and trim while the candle is unlit and cool.
- Keep candles away from drafts, vents, and open windows. Air currents make the flame flicker and burn unevenly, which produces more soot. A candle placed near a doorway or air conditioning vent is a common culprit.
- Burn for shorter sessions rather than all day. Most candles are designed for burns of one to four hours. Longer burns can cause the wick to mushroom and the wax to overheat, increasing soot.
- Use a candle snuffer instead of blowing out the flame. Blowing can splatter wax and send a puff of soot into the air that settles on nearby walls.
- Choose soy wax candles, which tend to burn cleaner than paraffin. Soy wax has a lower soot profile in most home settings, though any candle can produce soot if the wick is not trimmed or the flame is disturbed.
Safety and Ventilation
Soot on walls is a cosmetic issue, but it can also be a sign of poor ventilation or incomplete combustion. When you burn candles, keep the room ventilated, crack a window or use a range hood if available, and never burn candles in a small, closed room for extended periods.
For extensive soot or soot that appears after a fire-related event, treat it as a potential health concern. Wear gloves and eye protection when cleaning, and ventilate the area. If the soot is widespread or accompanied by a smoky odor that persists, consult a professional.
If you want to prevent soot buildup while keeping your ritual intact, a cleaner-burning candle makes the biggest difference. For guidance on candle meditation practices that minimize soot and maximize intention, our step-by-step ritual shows you how. Our soy wax intention candle is a playful sage and lavender blend made for cleansing energy and setting boundaries. For cleansing rituals where you want a lower-residue option, our incense sticks are a good alternative to a burning candle.
When to Stop Cleaning and Call a Professional
Some soot problems are bigger than a sponge can fix.
Stop cleaning and get help if:
- The stain will not lift after two gentle attempts
- The paint starts to come off on your cloth
- The soot returns quickly after cleaning
- You smell smoke when no candle is burning
A pro can assess the wall and recommend the right fix. There is no shame in it. Knowing when to stop protects your walls and your home.
Candle soot is a small annoyance, but it does not have to cost you your paint or your peace. With the right order of steps, most walls come clean in under an hour.
Explore our handcrafted intention candles, intuitively chosen mystery crystal boxes, and high-quality crystals, all chosen to support your practice.
Frequently Asked Questions
How do you remove soot from walls?
For general information about cleaning candle soot from walls, consult a qualified cleaning professional.
Does dish soap remove soot from walls?
For general information about cleaning candle soot from walls, consult a qualified cleaning professional.
Should you vacuum candle soot before washing a wall?
For general information about cleaning candle soot from walls, consult a qualified cleaning professional.
Can candle soot permanently stain painted walls?
For general information about candle soot and painted walls, consult a qualified cleaning professional.
